magento2虚拟产品
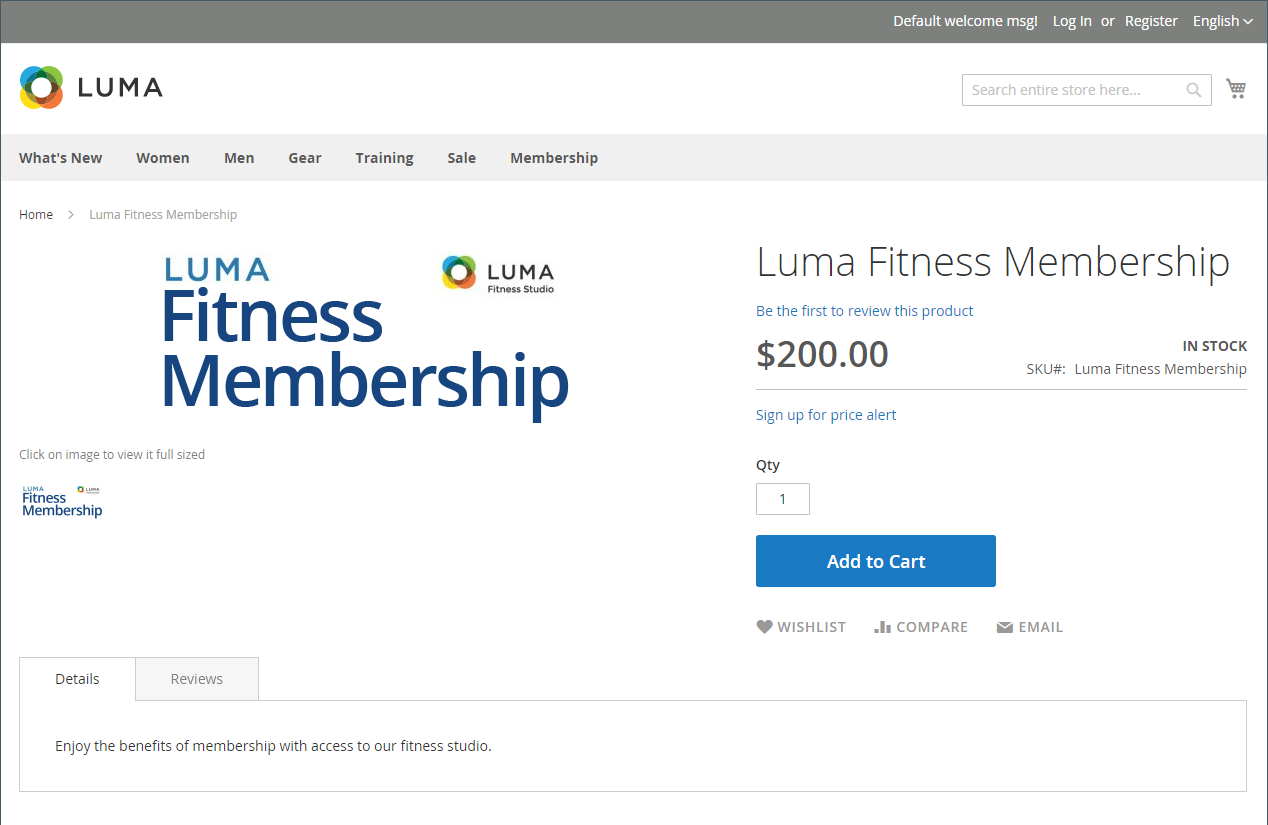
虚拟产品或数字商品代表无形项目,例如会员资格、服务、保证或书籍、音乐、视频或其他产品的订阅和数字下载。虚拟产品可以单独销售,也可以作为Grouped Product、Configurable Product或Bundle Product产品类型的一部分包含在内。
除了缺少Weight字段外,创建虚拟产品和简单产品的过程是相同的。以下说明演示了使用产品模板、必填字段和基本设置创建虚拟产品的过程。当您完成基础设置后,您可以根据需要完成其他产品设置。
PayPal 已弃用对通过 PayPal Express Checkout 销售数字商品的支持。他们建议您使用PayPal 支付标准或任何其他 PayPal 支付网关来处理任何包含虚拟产品的订单。
第一步:选择产品类型
-
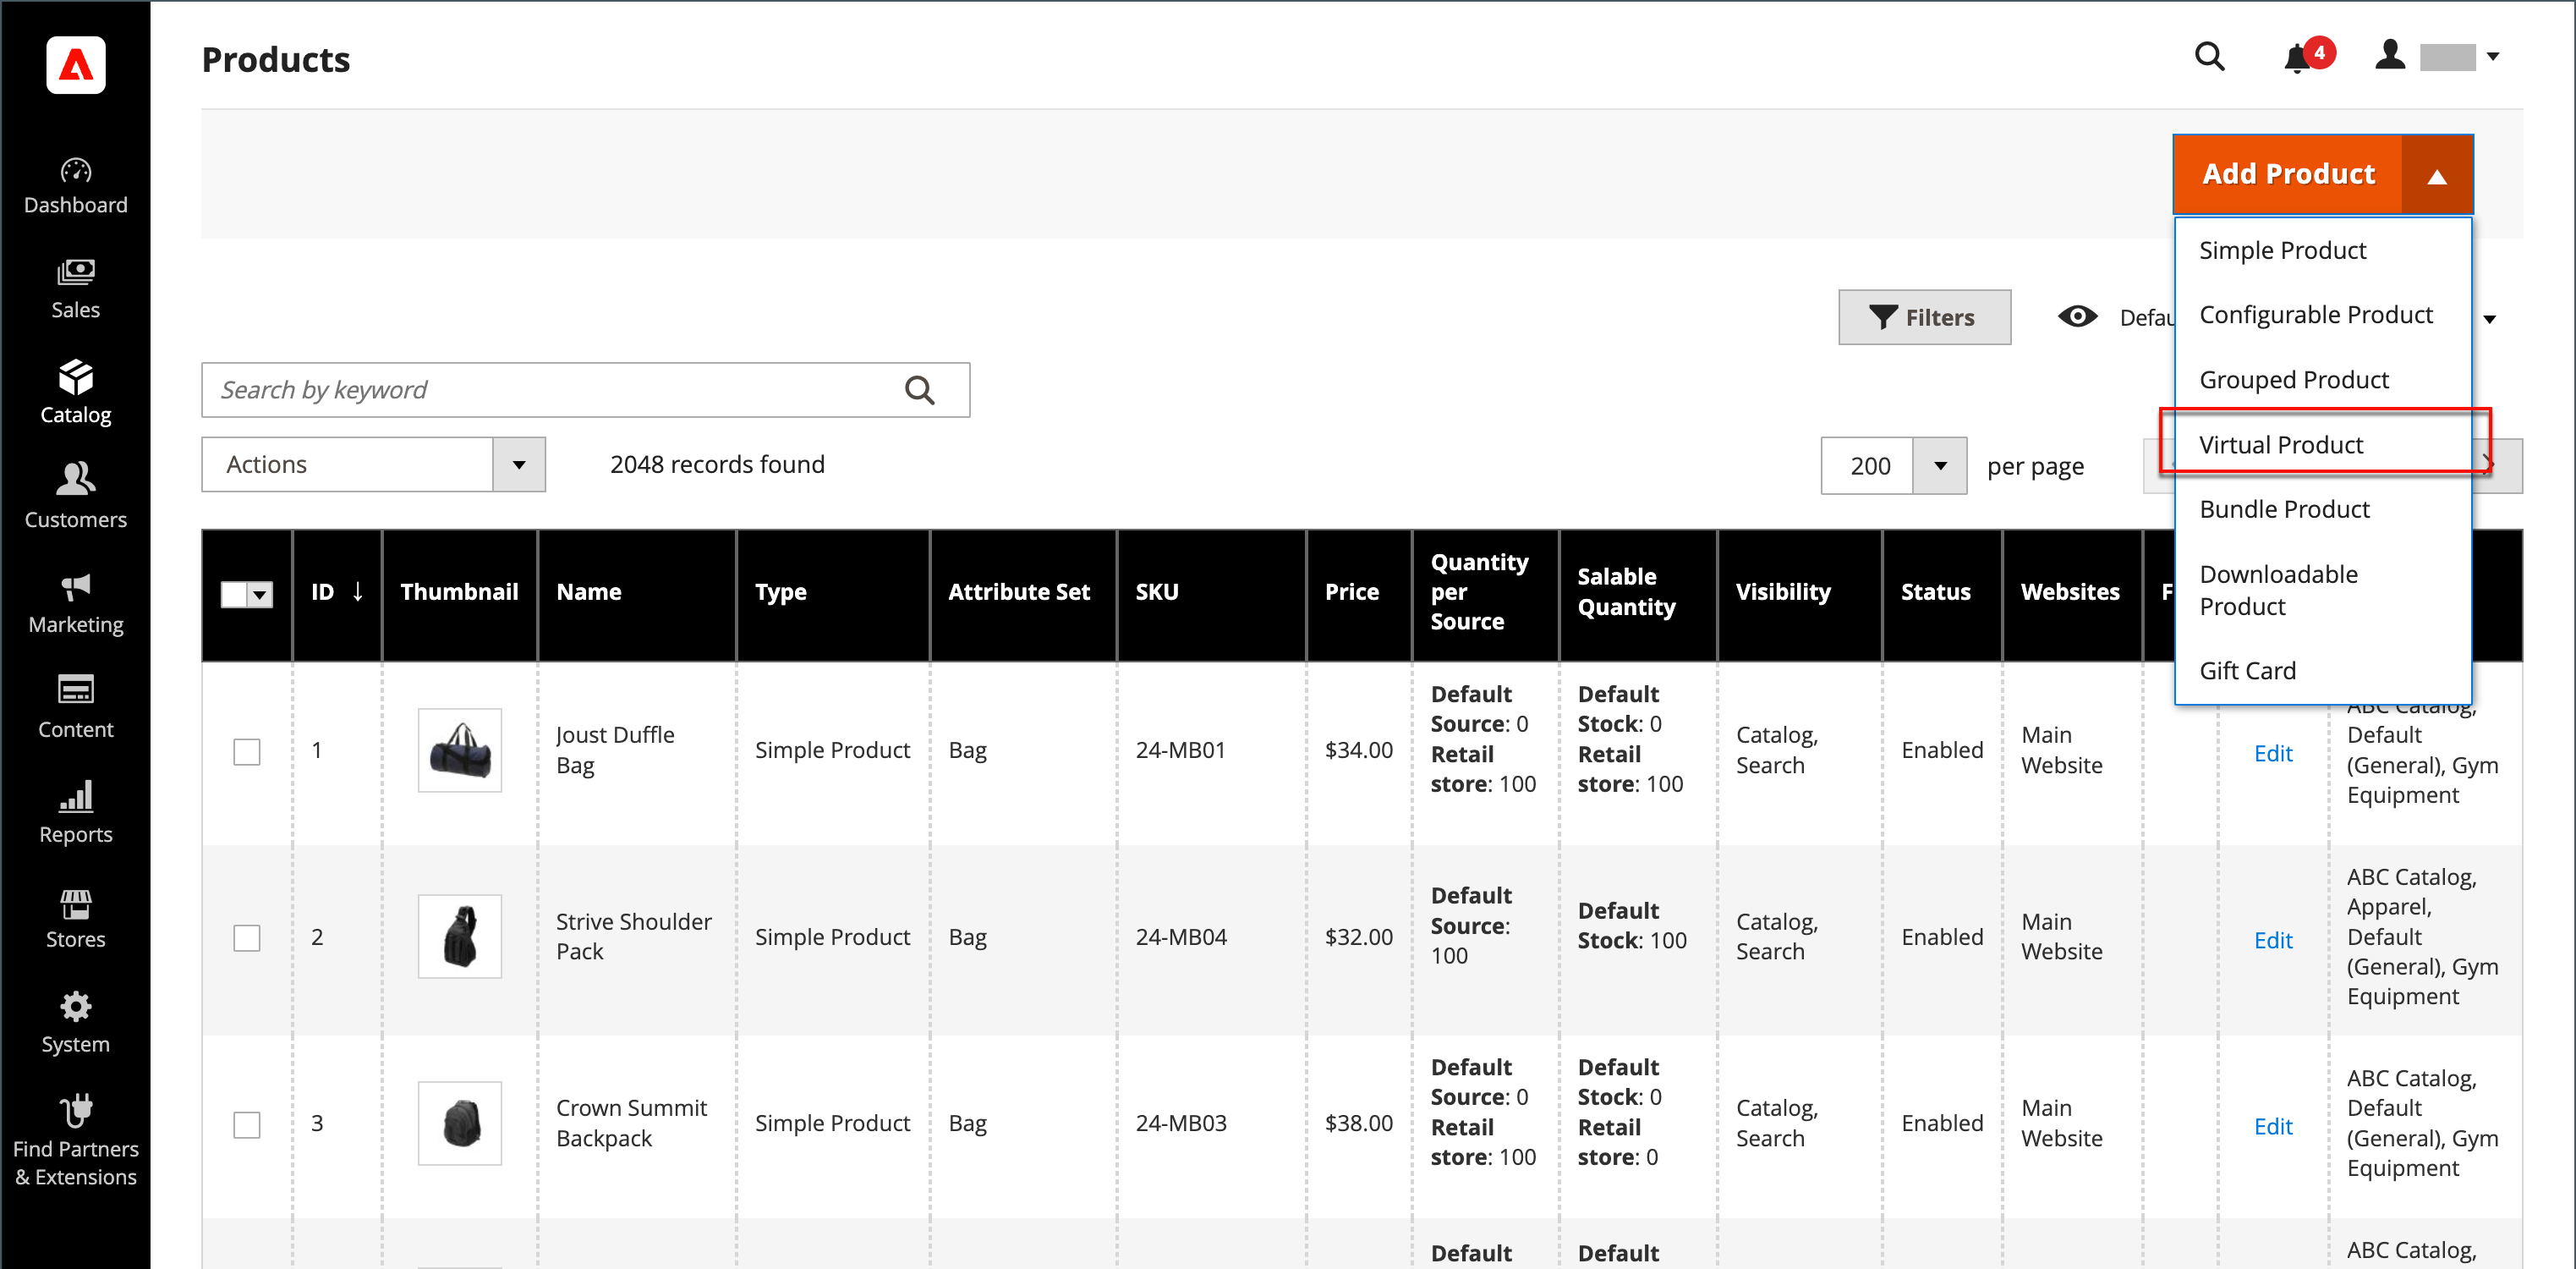
在管理侧栏上,转到目录>产品。
-
在右上角的添加产品( ) 菜单中,选择虚拟产品。

第 2 步:选择属性集
要选择用作产品模板的属性集,请执行以下操作之一:
-
单击“属性集”字段并输入属性集的全部或部分名称。
-
在显示的列表中,选择要使用的属性集。
更新表格以反映更改。
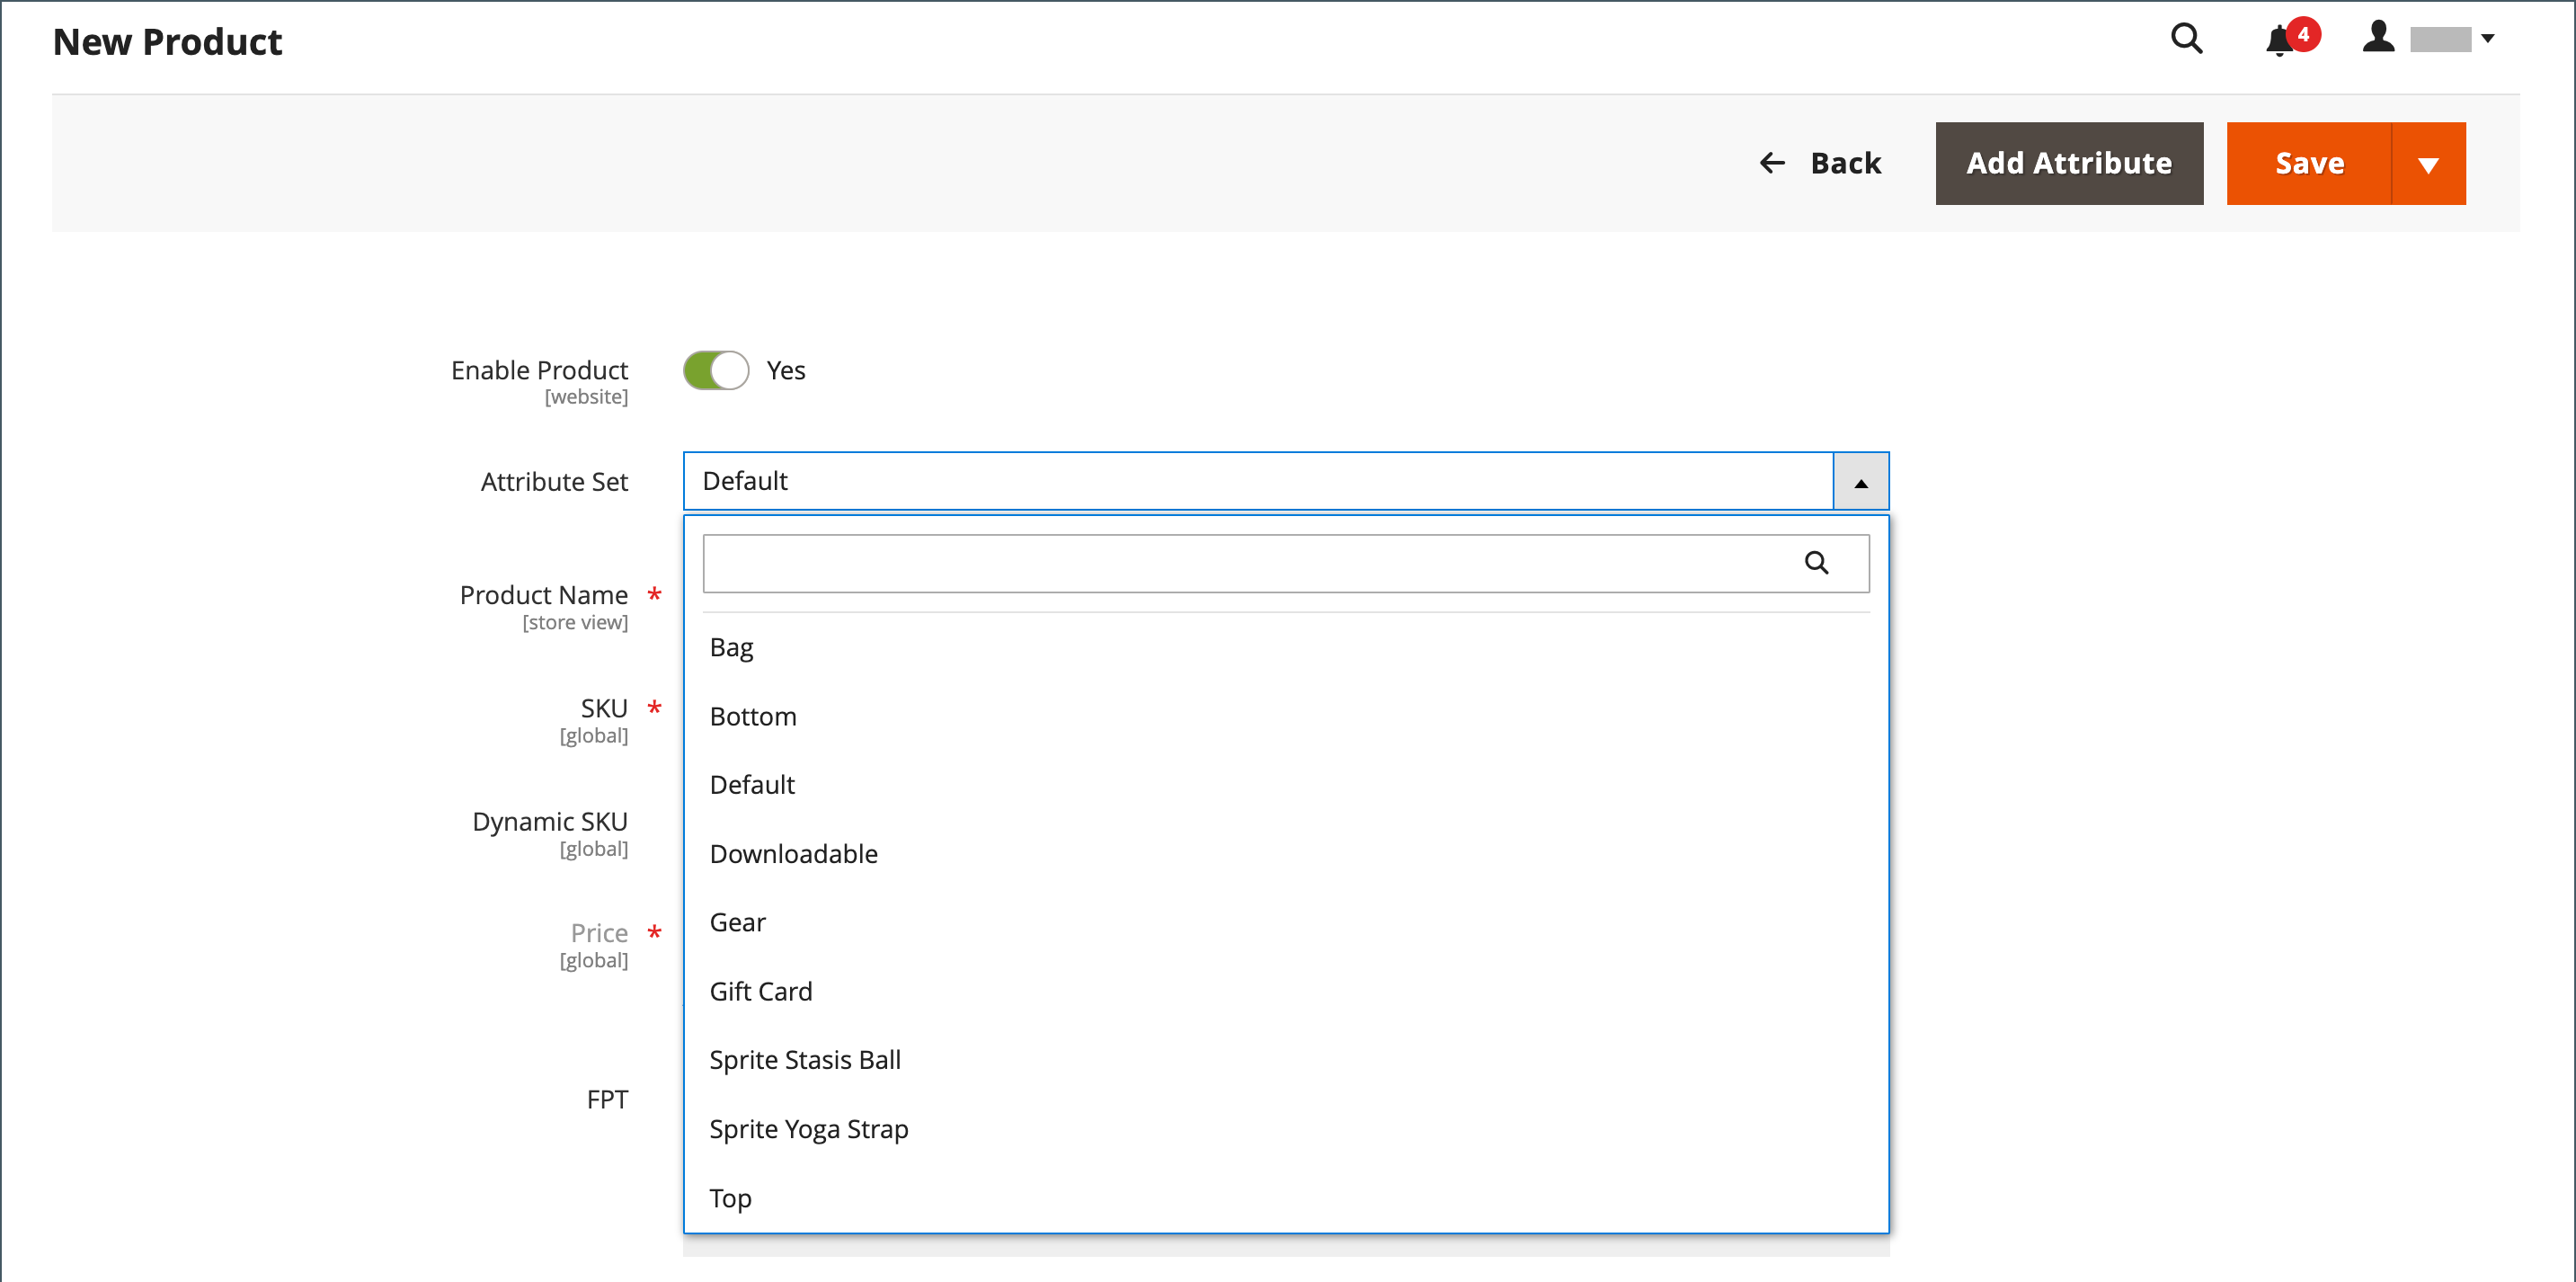
第 3 步:完成所需的设置
-
输入产品名称。
-
接受基于产品名称的默认SKU或输入其他名称。
-
输入产品价格。
-
由于产品尚未准备好发布,因此将Enable Product设置为
No。 -
单击保存并继续。
保存产品后,商店视图选择器会出现在左上角。
-
选择产品可用的商店视图。
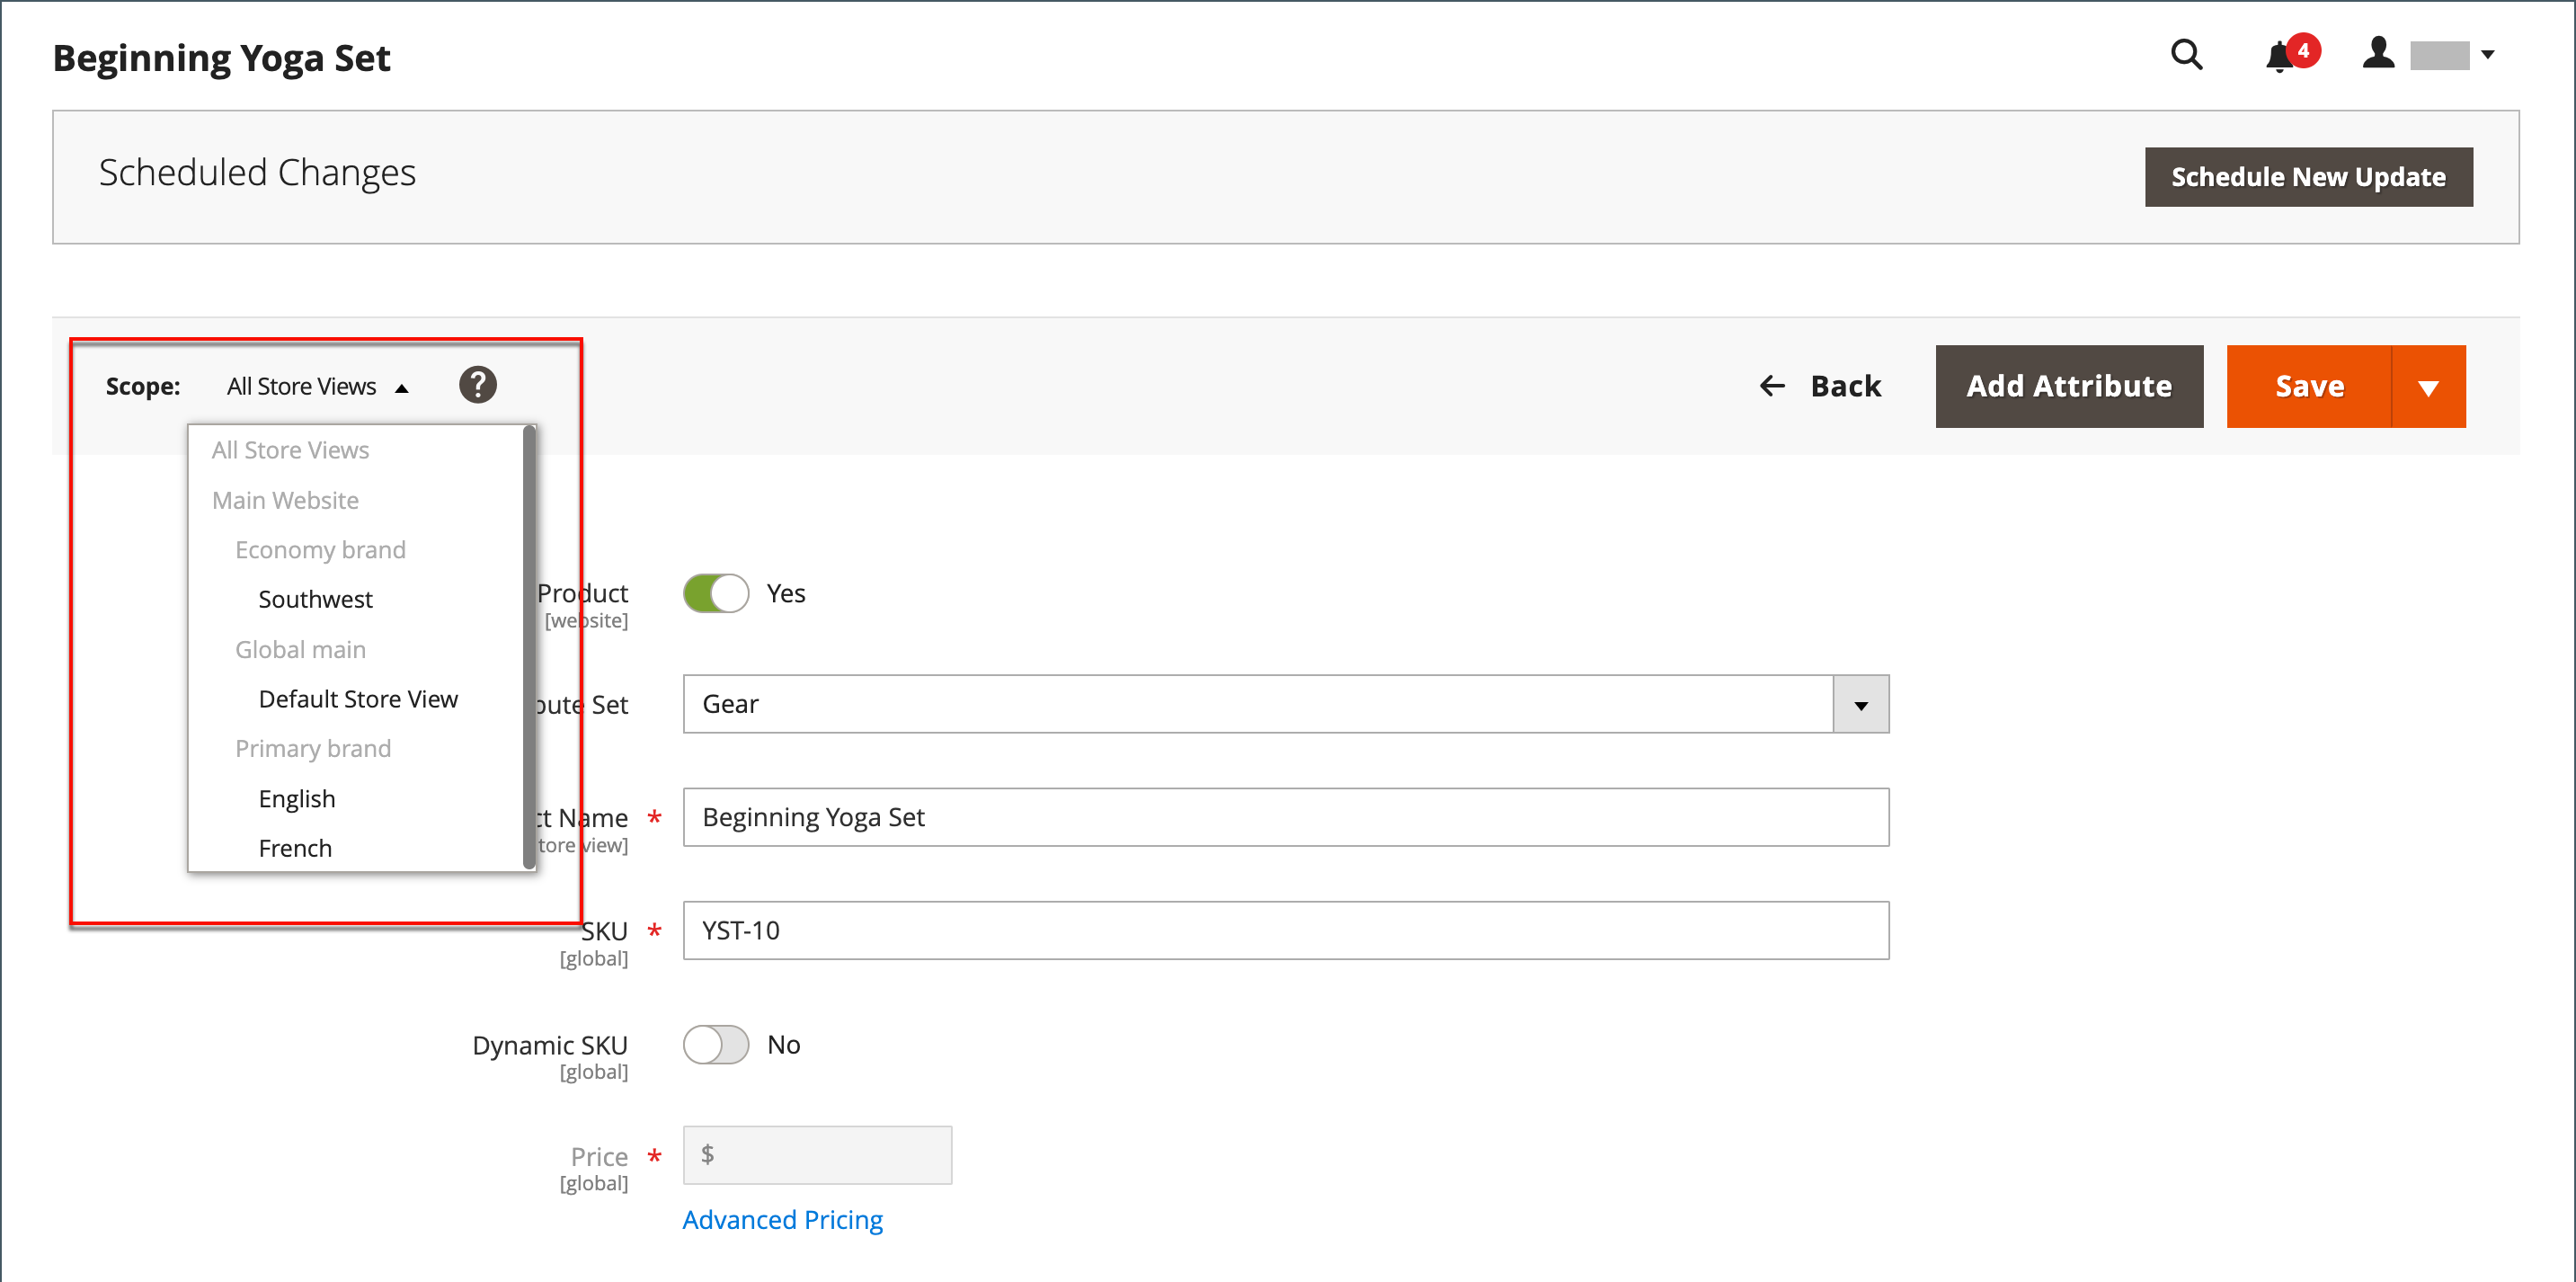
第四步:完成基本设置
-
将税级设置为以下之一:
NoneTaxable Goods
-
输入当前库存产品的数量并执行以下操作:
-
接受默认的Stock Status设置
In Stock。由于虚拟产品未发货,因此未使用重量字段。
-
接受默认的可见性设置
Catalog, Search。
笔记如果启用库存管理,单一来源商户在此部分设置数量。多来源商家在“来源”部分添加来源和数量。请参阅以下分配来源和数量(库存管理)部分。
-
-
要为产品分配类别,请单击“选择... ”框并执行以下任一操作:
选择现有类别:
-
开始在框中键入以查找匹配项。
-
选中要分配的类别的复选框。
创建类别:
-
单击新建类别。
-
输入类别名称并选择父类别以确定其在菜单结构中的位置。
-
单击创建类别。
可能还有其他描述产品的单独属性。选择因属性集而异,您可以稍后完成它们。
-
分配来源和数量(库存管理)
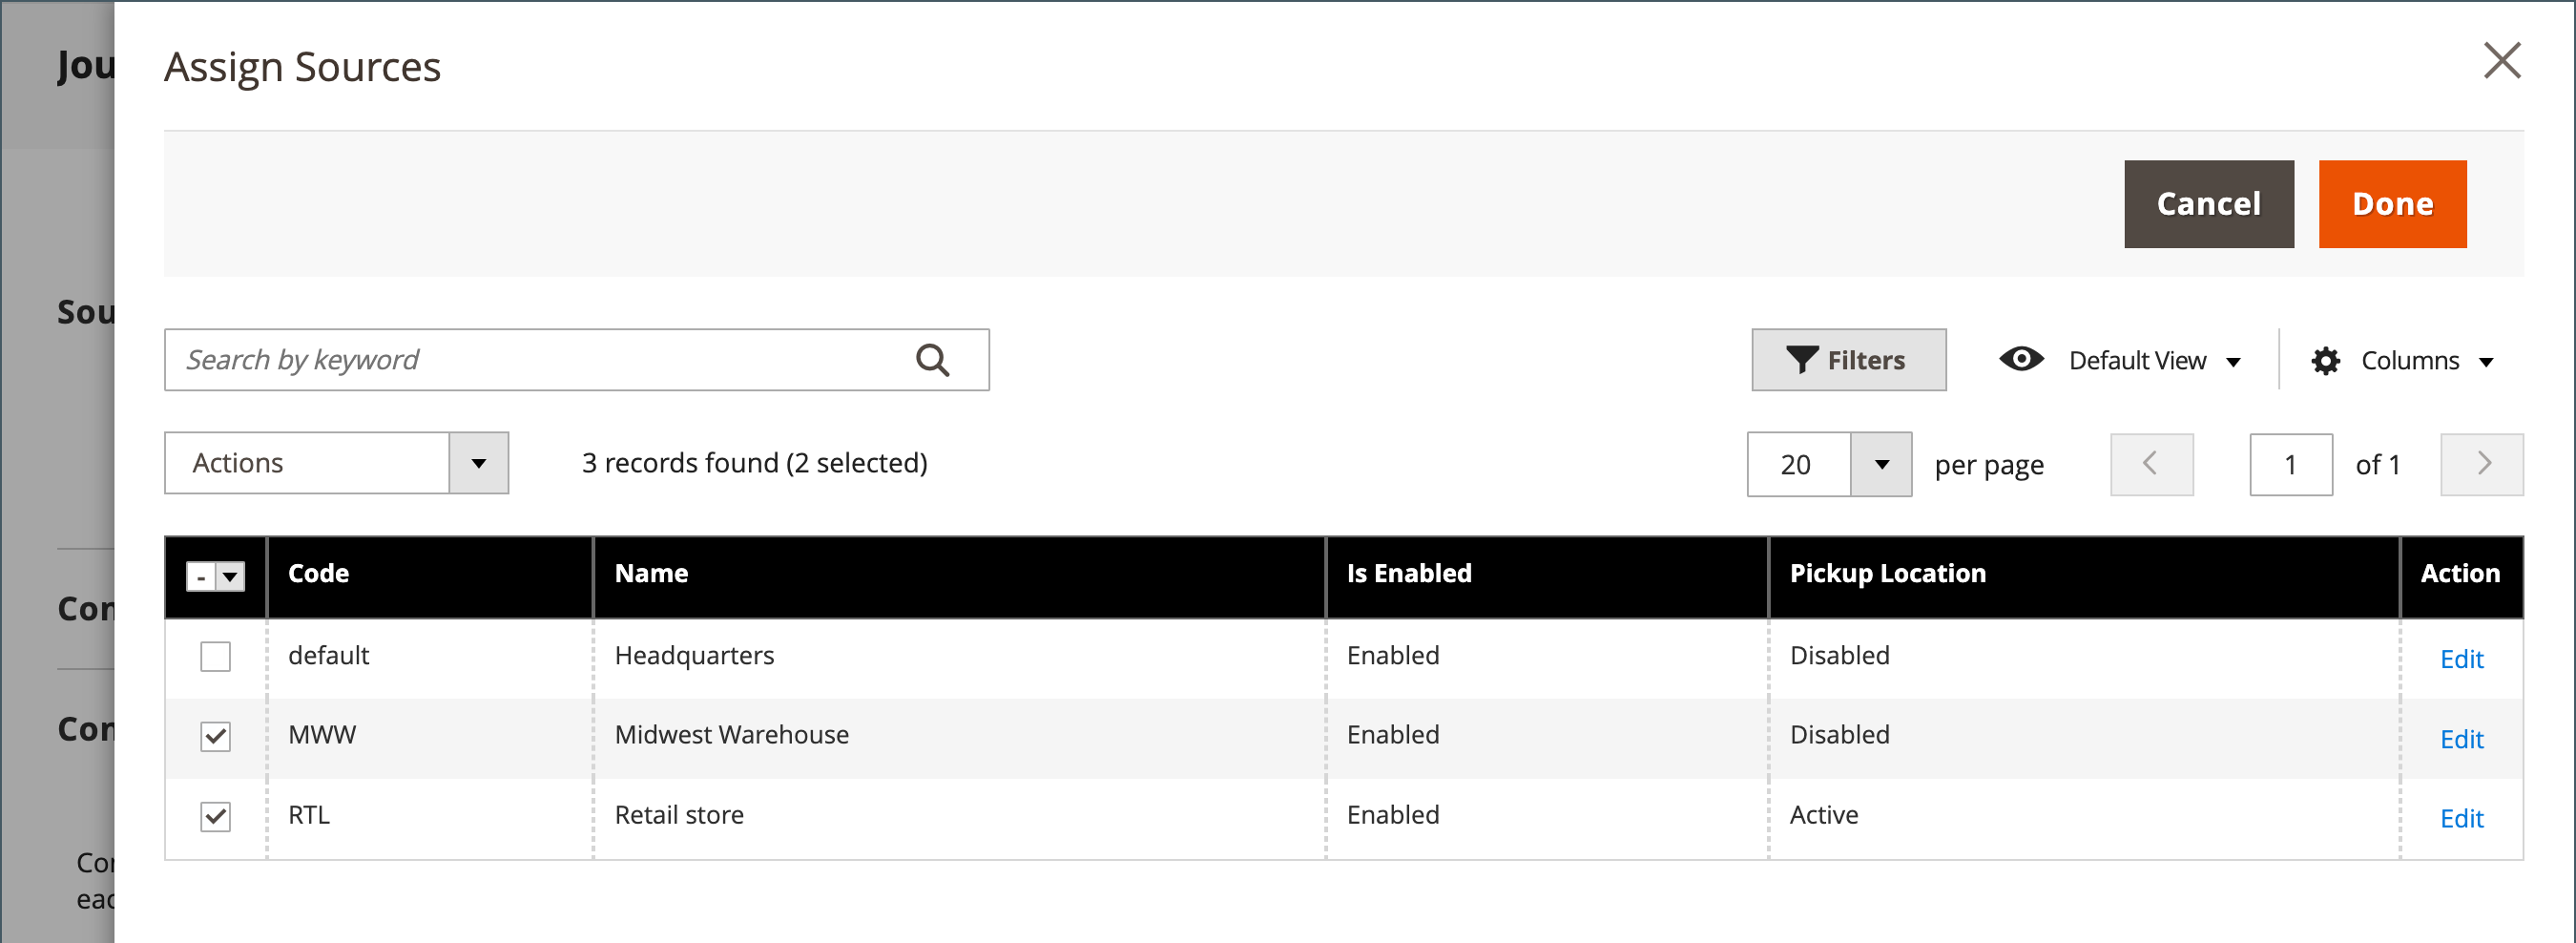
对于使用库存管理的多来源商家,向下滚动到来源部分并分配来源和数量:
-
要添加源,请单击分配源。
-
浏览或搜索来源并选中要为产品添加的来源旁边的复选框。
-
单击完成以添加源。
-
要管理源的数量和状态,请单击“高级库存”并将“管理库存”设置为
Yes。 -
将源项状态设置为
In Stock。 -
输入数量更新现有库存的数量。
-
要设置库存数量通知,请执行以下操作之一:
-
自定义通知数量- 清除通知数量使用默认复选框并在通知数量中输入一个数量。
-
默认通知数量- 选择通知数量使用默认复选框。Commerce 检查并使用 Advanced Inventory 或全局商店配置中的设置。

-
第五步:填写产品信息
根据需要填写以下部分中的信息:
- 内容
- 图片和视频
- 搜索引擎优化
- 相关产品、追加销售和交叉销售
- 可定制的选项
- 网站中的产品
- 设计
- 礼品选项
这是可下载的产品吗?默认情况下禁用该选项。为虚拟产品启用此功能使产品可下载。
第 6 步:发布产品
-
如果您准备好在目录中发布产品,请将启用产品设置为
Yes。 -
执行以下操作之一:
-
方法一:保存预览
-
在右上角,单击“保存” 。
-
要查看商店中的产品,请在管理( ) 菜单上选择客户视图。

商店在新的浏览器选项卡中打开。

-
-
方法二:保存关闭
在保存(
 ) 菜单上,选择保存并关闭。
-
要记住的事情
-
虚拟产品用于无形产品,例如服务、订阅和保修。
-
虚拟产品很像简单的产品,但没有重量。
-
除非购物车中有有形产品,否则结账时不会出现送货选项。
Weight field, the process of creating a virtual product and a simple product is the same. The following instructions demonstrate the process of creating a virtual product using a product template, required fields, and basic settings. When you finish the basics, you can complete the other product settings as needed.
PayPal has deprecated support for the sale of digital goods through PayPal Express Checkout. They recommend that you use either PayPal Payments Standard or any other PayPal payment gateway to process any order that includes virtual products.

Step 1: Choose the product type
-
On the Admin sidebar, go to Catalog > Products.
-
On the Add Product (
 ) menu at the upper-right corner, choose Virtual Product.
Step 2: Choose the attribute set
To choose the attribute set that is used as a template for the product, do one of the following:
-
Click in the Attribute Set field and enter all or part of the name of the attribute set.
-
In the displayed list, choose the attribute set that you want to use.
The form is updated to reflect the change.

Step 3: Complete the required settings
-
Enter the Product Name.
-
Accept the default SKU that is based on the product name or enter another.
-
Enter the product Price.
-
Because the product is not yet ready to publish, set Enable Product to
No. -
click Save and continue.
When the product is saved, the Store View chooser appears in the upper-left corner.
-
Choose the Store View where the product is to be available.

Step 4: Complete the basic settings
-
Set Tax Class to one of the following:
NoneTaxable Goods
-
Enter the Quantity of the product that is currently in stock and do the following:
-
Accept the default Stock Status setting of
In Stock.Because a virtual product is not shipped, the Weight field is not used.
-
Accept the default Visibility setting of
Catalog, Search.
NOTEIf you enable <a href="https://experienceleague.adobe.com/docs/commerce-admin/inventory/introductio
-
 邮件群发-邮件群发软件|邮件批量发送工具|群发邮件平台|批量邮箱发送系统公司

